Homemade Mozzarella Cheese - Cheesy Update
Moderators: BlackDuck, Beer-lord, LouieMacGoo, philm00x, gwcr
Homemade Mozzarella Cheese - Cheesy Update
This thread stems from one entitled: "Anyone making their own Cheese?"
viewtopic.php?f=7&t=2144
This is the process thread with pics...
We did this on Sunday with my grandson and some assistance from my son...
It is important to note that you need to use non-reactive pan, bowls and utensils... No copper or aluminum... Enameled and Stainless Steel is fine, as is ceramic.
First, we measured out a teaspoon and a half of Citric Acid crystals to a stockpot and added about a half cup of water to dissolve the crystals. You can add a teaspoon of good salt at this point to taste if desired.
We obtained the Citric Acid and our Rennet Tablets from my LHBS... I have found that many carry cheese making supplies... Natural food stores and some supermarkets will also carry them. (you can use Lemon Juice in place of citric acid crystals, typically the juice of one half to one lemon).
That's the citric acid on the left and the rennet tablets on the right...
Then we add a gallon of milk... We used Whole Vitamin D Milk that was pasturized. (Do NOT use Ultra-Pasturized milk as it will not work).
Apply medium heat to raise the temperature to about 90*F.
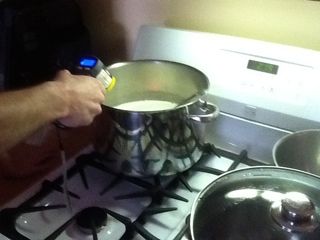
While the milk is heating, prepare the rennet that will be used as a coagulant... Ours are in tablet form. Each tablets will treat 20 litres of milk so for a gallon, one quarter of a tablet is fine.
Liquid Rennet is also available and you would use one quarter teaspoon if liquid.
Crush the one quarter tablet and add about a third of a cup of water and mix well.
Once the milk has reached our target temperature, the milk will be just starting to curdle...
Turn off the heat at this point.
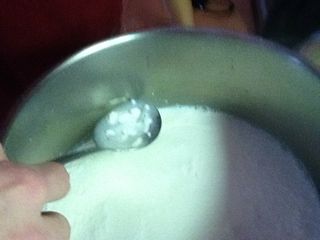
Add the rennet mixture, and give a gentle stir using an up and down motion for about 30 seconds... Stop and use the spoon to help the liquid go still. The real curdleling begins now!
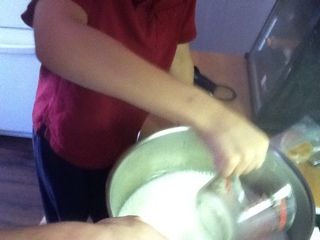
Cover and go on with your life for five to ten minutes... Do not disturb the pot as the magic is happening!
Ding! Once the time is up, it's time to Cut the Cheese! (insert cheese cutting jokes here!)
We used an offset cake spatula but a butter knife will do. Insert on one end to the bottom and draw across the pot in a straight line... Move the spatula over an inch and repeat. Continue until the entire surface has been cut in parallel lines. Take care here as the curds will be somewhat custard like, but still very loose and will be floating on the whey so it moves around a bit...
Then, rotate the pot 90 degrees and repeat, ending up with one inch cubes...
Leave the cover off and re-apply medium heat to raise the temp of the liquid to 105*F.
Once at temp, remove from heat and using a slotted spoon, begin spooning the curds out into a collander positioned over a bowl to drain off the excess whey. Save the whey by pouring it back into the pot. It can be used in cake mixes, soups, juice drinks and smoothies as it is full of protein! (stores in the fridge for a week or so...)
Here is what the remaining whey looks like...
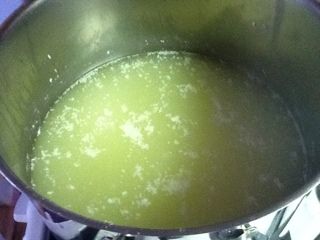
If you need to get even more of the liquid out, you can use your clean hand tools to squeeze it out a bit...
Place the cheese in a microwave safe, non-reactive bowl and heat it in the science oven (microwave) on high for one minute.
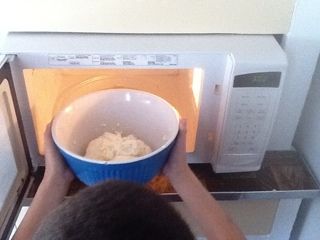
Knead the cheese for a minute or two, folding and stretching it while you do so... Careful, it's getting hot...
Then repeat in the science oven but for only 30 seconds this time...
Knead and stretch again... It should be getting shiny and coming together like cheese... IF NEED BE, you can do another 30 seconds in the science oven.
Form into a ball and you should have something like this...
I like to split it into two balls, cool in a bowl of cold water (salt optional)....
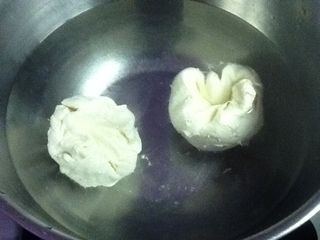
Then, wrap in plastic wrap and store in a food baggie in the fridge for up to a week to ten days. You can also freeze it and thaw for use later.
We were eating it right away, here is some on a cracker with a drizzle of Balsamic Vinegar... Choose your own method of consumption!
Then we made a pizza to go with our dinner!
Now...
- Ibasterd
- Brew Master
- Posts: 699
- Joined: Wed Sep 25, 2013 1:29 pm
- Location: In the shadow of the Mouse.
Re: Homemade Mozzarella Cheese - Cheesy Update
This looks fun. I may give it a try with my kids as well.
What is best in life?" "To crush your enemies -- See them driven before you, and to hear the lamentation of their women!"
Re: Homemade Mozzarella Cheese - Cheesy Update
Yeah, we had a good time... An even better time eating it!
Re: Homemade Mozzarella Cheese - Cheesy Update
Thanks for the detailed write up. I may have to give this a try.
Naked Cat Brewery On Tap
- Rayyankee
- Fully Fermented
- Posts: 257
- Joined: Wed Aug 14, 2013 9:48 pm
- Location: central CA foothills of the southern sierras
Re: Homemade Mozzarella Cheese - Cheesy Update
That looks great the exact same method my wife uses and the cheese is outstanding!
Re: Homemade Mozzarella Cheese - Cheesy Update
Wow...that looks good. And it looks like an easy process.
ANTLER BREWING
Drinking
#93 - Gerst Amber Ale
Conditioning and Carbing
Fermenting
On Deck
Drinking
#93 - Gerst Amber Ale
Conditioning and Carbing
Fermenting
On Deck
Re: Homemade Mozzarella Cheese - Cheesy Update
I thought I already had... but this is now bookmarked.
Thanks for sharing and have I mentioned that I love this lately?
Sibling Brewers
Re: Homemade Mozzarella Cheese - Cheesy Update
My wife noticed that Midwest sold cheese making supplies so I may be doing some soon myself. Thanks for the pics they helped alot it looks easier than I thought.
Re: Homemade Mozzarella Cheese - Cheesy Update
Glad y'all are enjoying the pics!
It's pretty easy to do and it actually took longer to do the pics and the whole final post than it did to make the cheese!
Re: Homemade Mozzarella Cheese - Cheesy Update
Thanks BigPapaG for posting this thread, of course you made it look easy, but I bet you a lot of Borg members including me will try our hand at making some cheese after seeing this, Thanks again for getting us started on another new endeavor.
Happy Hound Brewery
“I have not failed. I've just found 10,000 ways that won't work.”
― Thomas A. Edison
“I have not failed. I've just found 10,000 ways that won't work.”
― Thomas A. Edison
Re: Homemade Mozzarella Cheese - Cheesy Update
Next time I make paneer I will try to remember to take pics and post them here. It's even easier then this.
- FedoraDave
- FedoraDave
- Posts: 4208
- Joined: Fri Aug 09, 2013 5:52 pm
- Location: North and west of the city
- Contact:
Re: Homemade Mozzarella Cheese - Cheesy Update
I may try this! I bet it's delicious. And if I get a chance to make spent-grain pizza dough, this would be great on it!
Obey The Hat!
http://www.homebrew-with-the-hat.com
Some regard me as a Sensei of Brewing
http://www.homebrew-with-the-hat.com
Some regard me as a Sensei of Brewing
Fedora Brauhaus
Re: Homemade Mozzarella Cheese - Cheesy Update
It was, thanks, and a lot of fun too! I love doing stuff with my gkids!FedoraDave wrote:I may try this! I bet it's delicious. And if I get a chance to make spent-grain pizza dough, this would be great on it!
Spent grain Pizza with fresh homemade Mozz sounds great right now!
Re: Homemade Mozzarella Cheese - Cheesy Update
I made cheese decades ago, usually cheddar, I think, but I haven't done it in a really long time. I may try it again after reading this thread.
Re: Homemade Mozzarella Cheese - Cheesy Update
Cool! I would like to try making cheddar but as of yet have not ventured beyond soft cheeses.