Danby 440BL Kegerator Conversion

Have a question on how to keg your beer or just want some tips on bottling! Don't stick a cork in it until you ask the Borg!

Moderators: BlackDuck, Beer-lord, LouieMacGoo, philm00x, gwcr

User avatar
gwcr
Moderator
Moderator
Posts: 1404
Joined: Mon Aug 05, 2013 9:11 am
Location: Cedar Rapids, IA

Danby 440BL Kegerator Conversion

Post by gwcr »

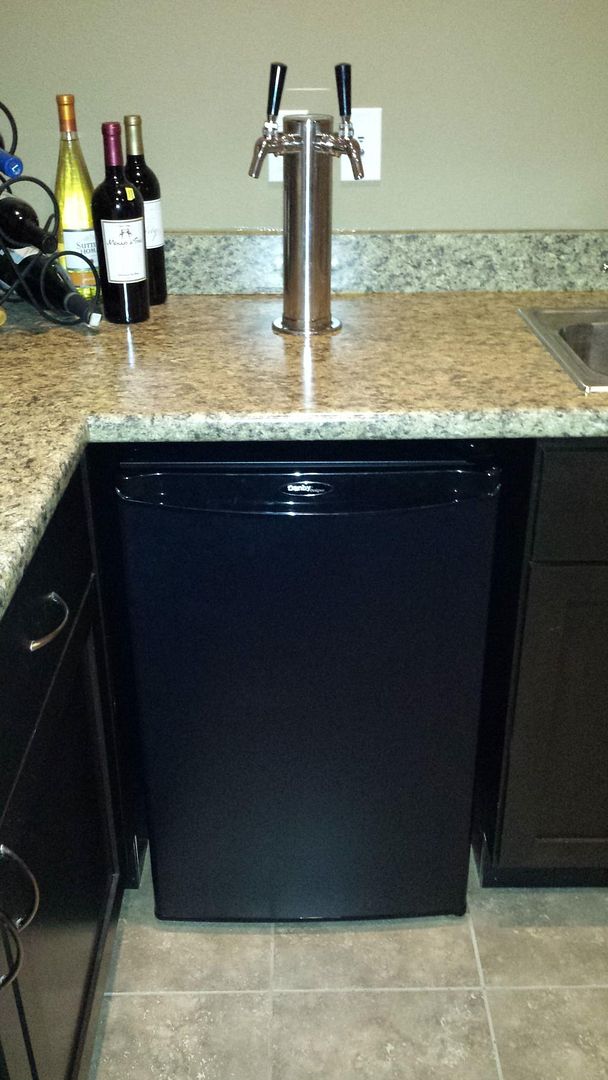
Finally found the time to convert my Danby 440BL fridge into a full time kegerator this week. I've been kegging for a couple years with only one keg in the fridge and a picnic tap. Worked fine, but wasn't the most user friendly setup when people came over (open fridge, pull out tap, fill glass, put tap back in and make sure it didn't drip, etc.), and I could only have one keg at a time in there. Also, my double faucet tower had been sitting in a box for 8 months so it was definitely time to put that investment to use!

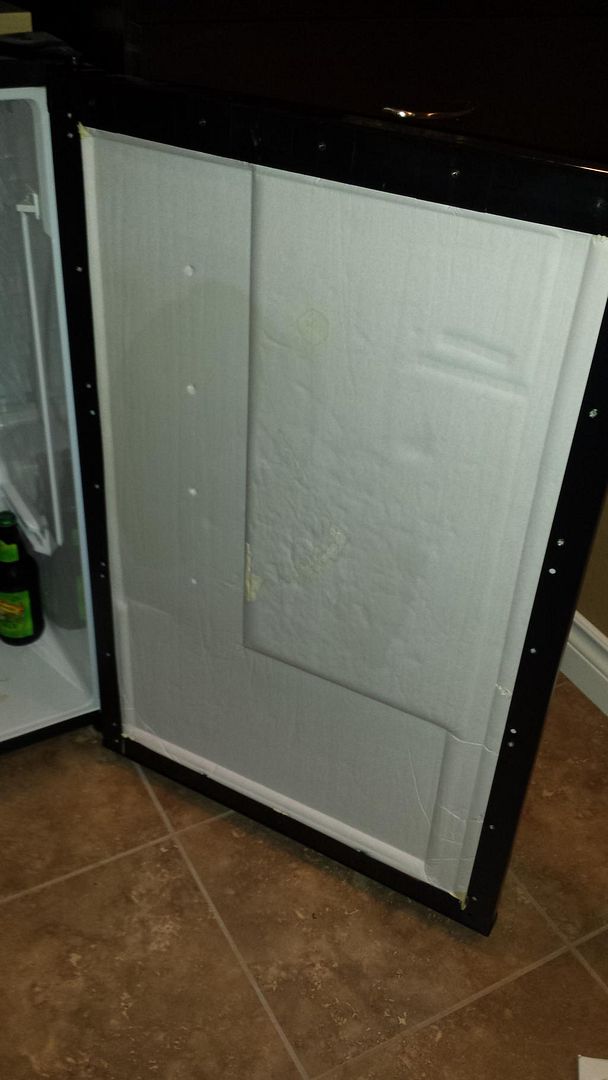
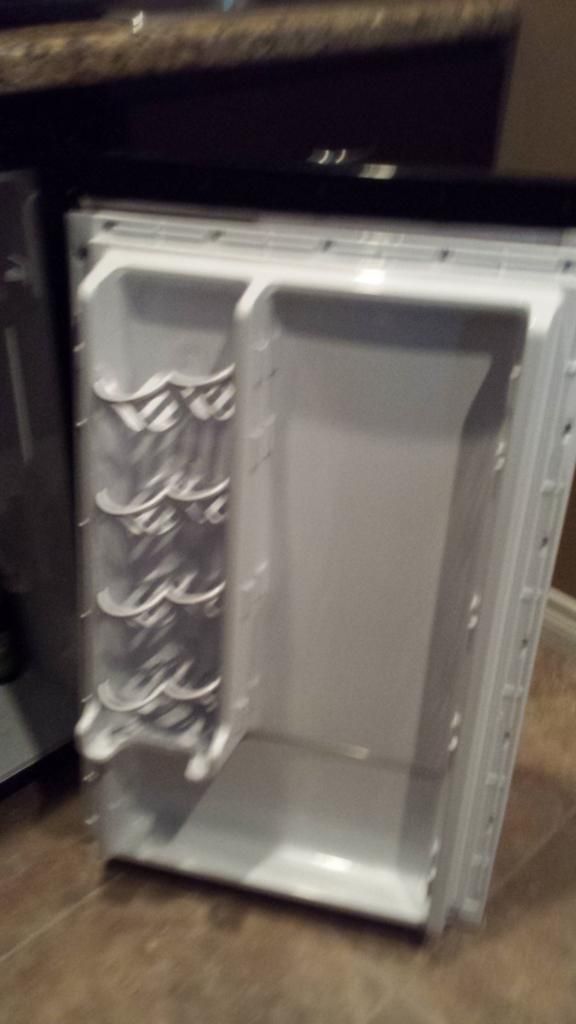
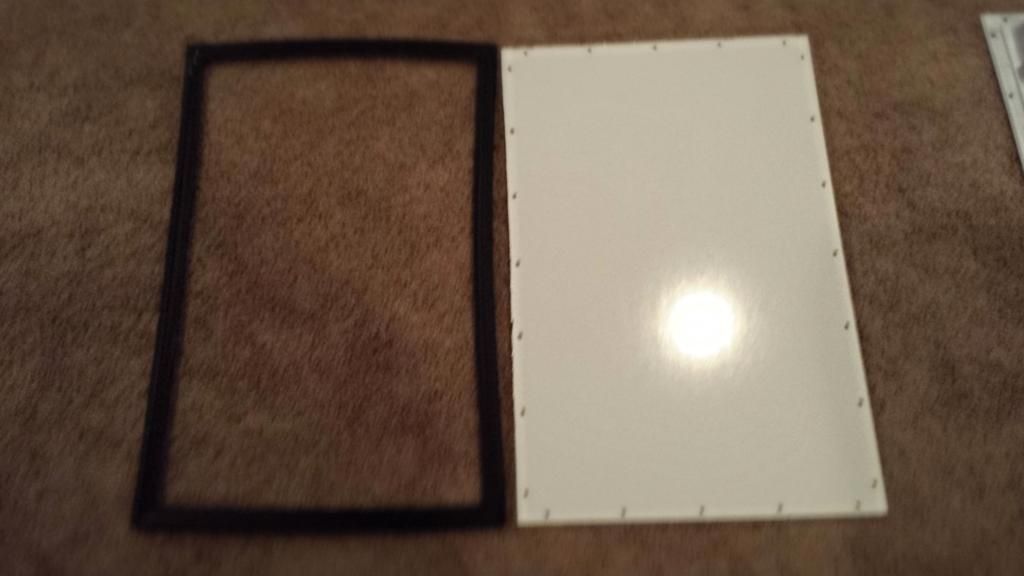
In order to fit two cornies, I had to remove the door panel because it took up too much space inside. Thankfully, my Danby was a slightly older model so the door panel was screwed on instead of glued on. Super easy to take off. Just removed the screws and it came right off. The seal was easy to remove from the panel as there was no adhesive there either. (Sorry for the blurry pic)
Image
Image

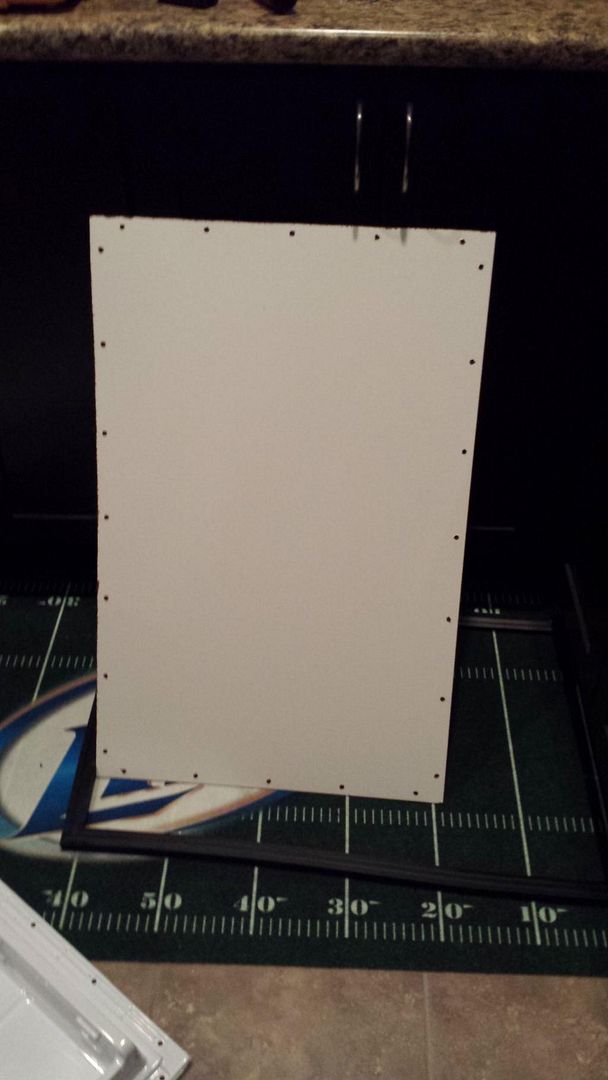
I picked up a 4’x4’ piece of marker board from Lowes, traced around the door panel, marked the screw holes and cut it out.
Image

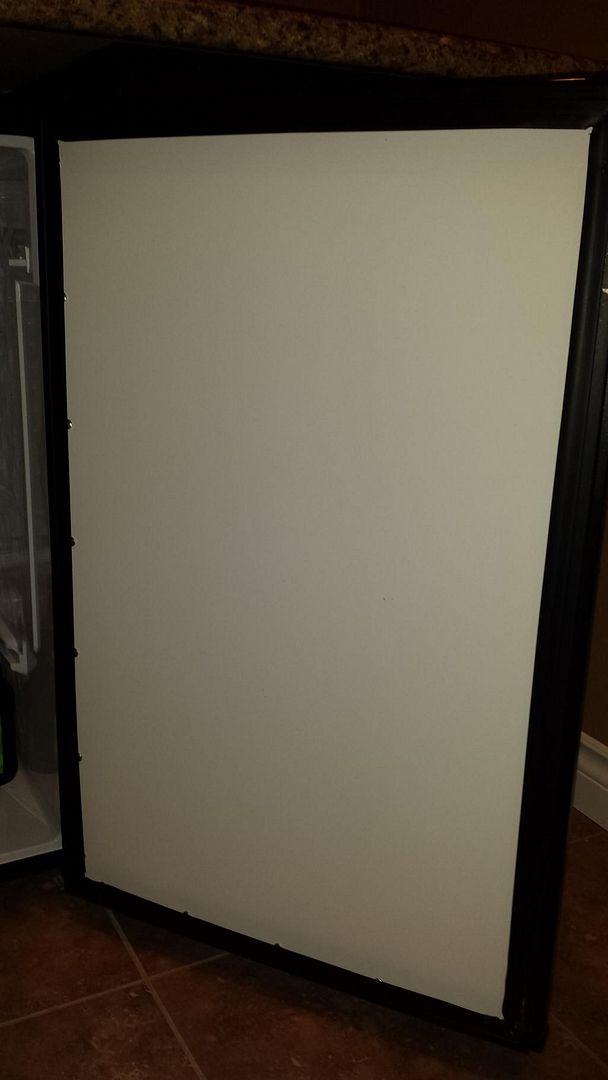
Put the door seal from the original door panel on the new “door panel” and screwed it back on. Perfect fit, and the door still closed and sealed!
Image
Image
Image

The only downside is the old panel would trip the switch for the fridge light when it closed. Decided to just remove the bulb for now instead of trying to figure out how to rig something up on the new door panel. Another bonus is the door panel is now a dry erase board, so I can write info about the brews on there if I want to.

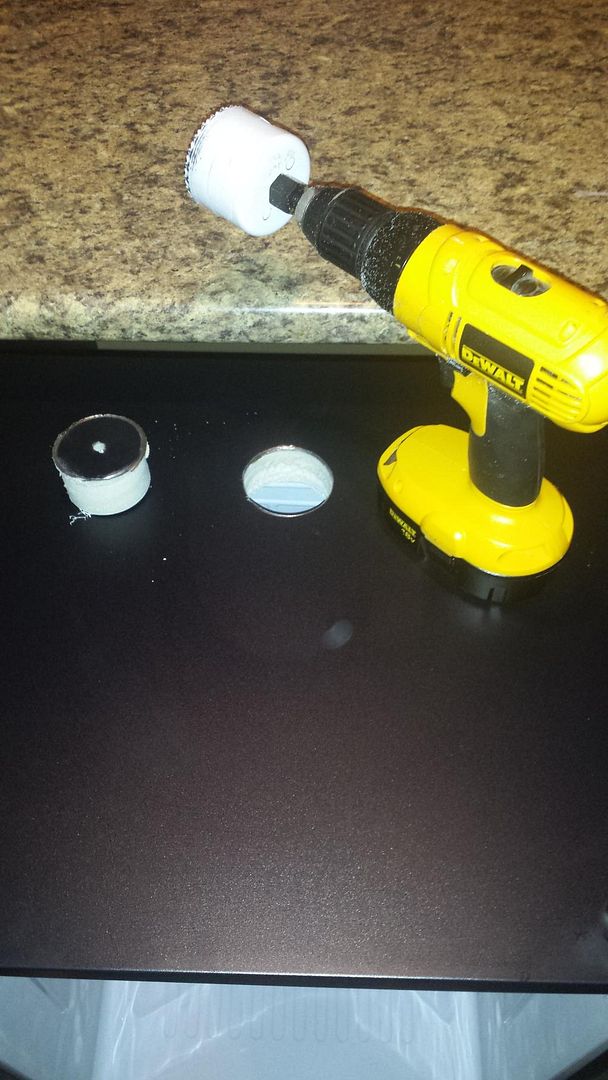
The next part was a bit stressful since it’s something you really can’t undo. Time to cut big holes in the top of the fridge and counter. I started the fridge from the inside to make sure I didn't hit any wires or cooling lines. Once the drill bit from the hole saw popped through the metal top, I finished the cut from above.
Image

I sealed up the inside of the hole with foil tape, then put the fridge back in place and marked the center of the hole on the underside of the counter. Drilled a pilot hole from underneath, and used the hole saw from the top to get a nice hole in an otherwise perfect counter…
Image

Since I did a countertop mount instead of directly to the fridge, I needed a conduit between the counter and the fridge to keep it a closed system. A length of 2” PVC between the two holes sealed with silicon adhesive on both ends did the trick there. 2” PVC is actually 2-3/8” outside diameter, so it fit the hole nicely with only a small gap to seal with the silicon.

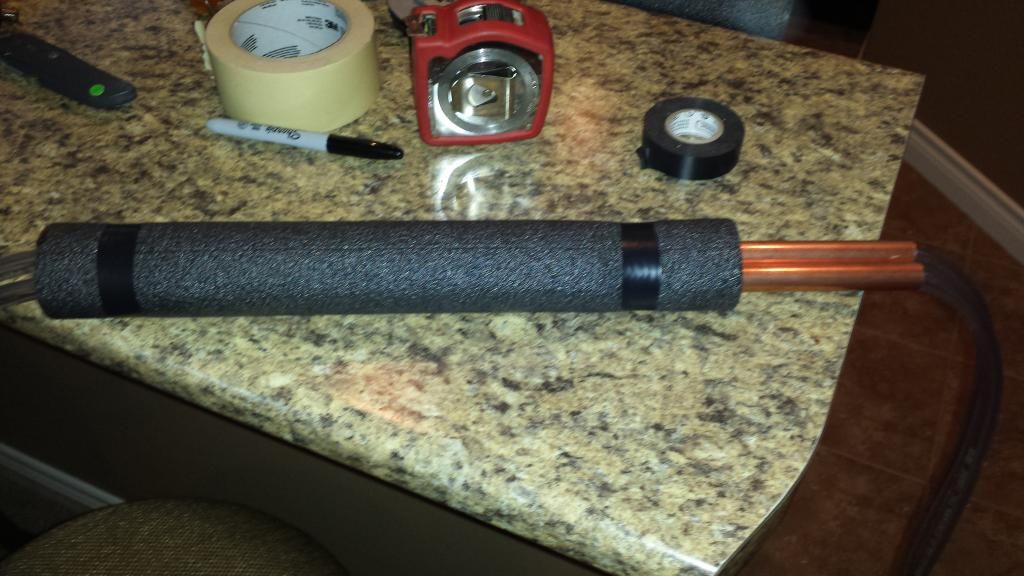
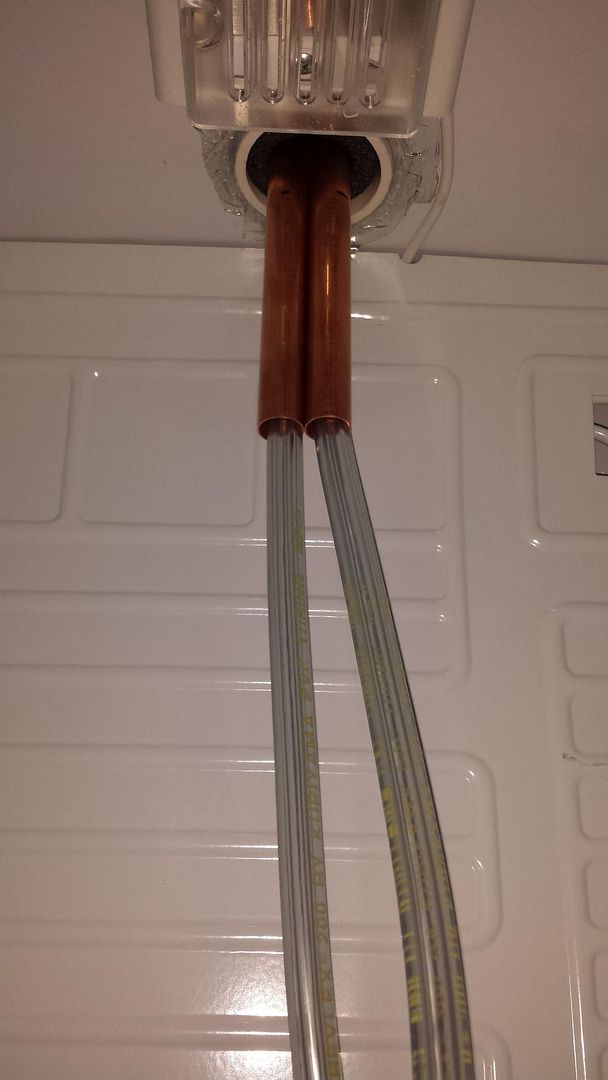
I had been reading about the need to keep the lines in the tower cold to avoid a foamy first pour. I was considering building a small blower until I ran across a passive cooling thread on HBT. Since copper is a great conductor of heat/cold, many were using copper pipe with great results in keeping the lines cold all the way to the tap. I chose this method so I wouldn't have to build something else, drill another hole in the fridge and mess with electricity. I used enough copper so about 4 inches protruded into the fridge. Wrapped the part of the copper that would be inside the tower with pipe insulation and threaded it up the lines into the tower.
Image

Then fed the lines through the conduit and installed the tower on the countertop.
Image
Image

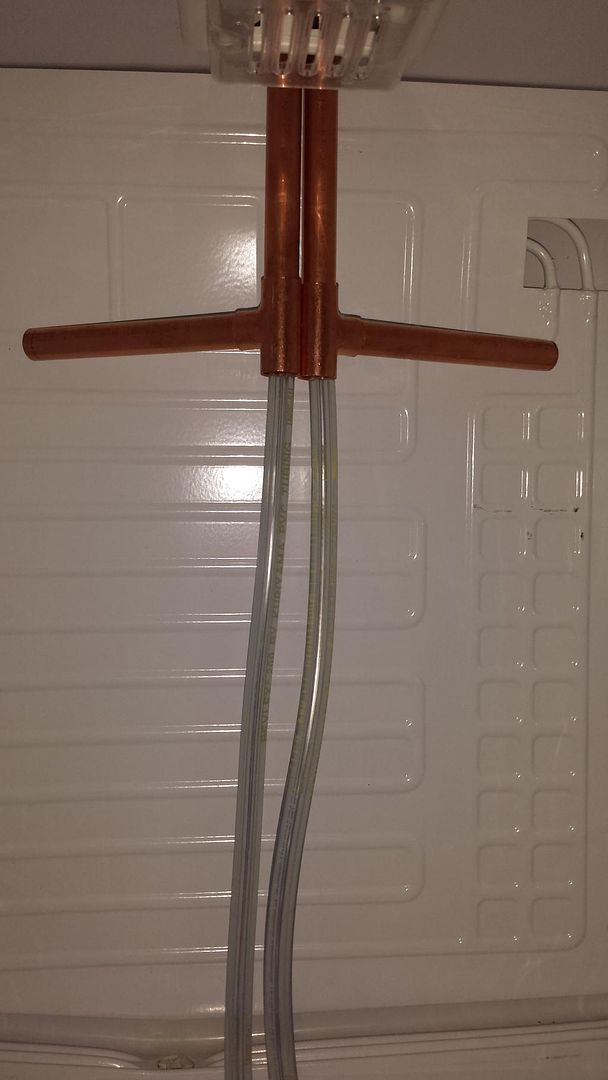
I wanted to give the copper a little more surface area, so I threaded a couple of T’s up the lines and put a couple extensions out to the sides by the coils. Friction fit only here as they aren't going anywhere.
Image

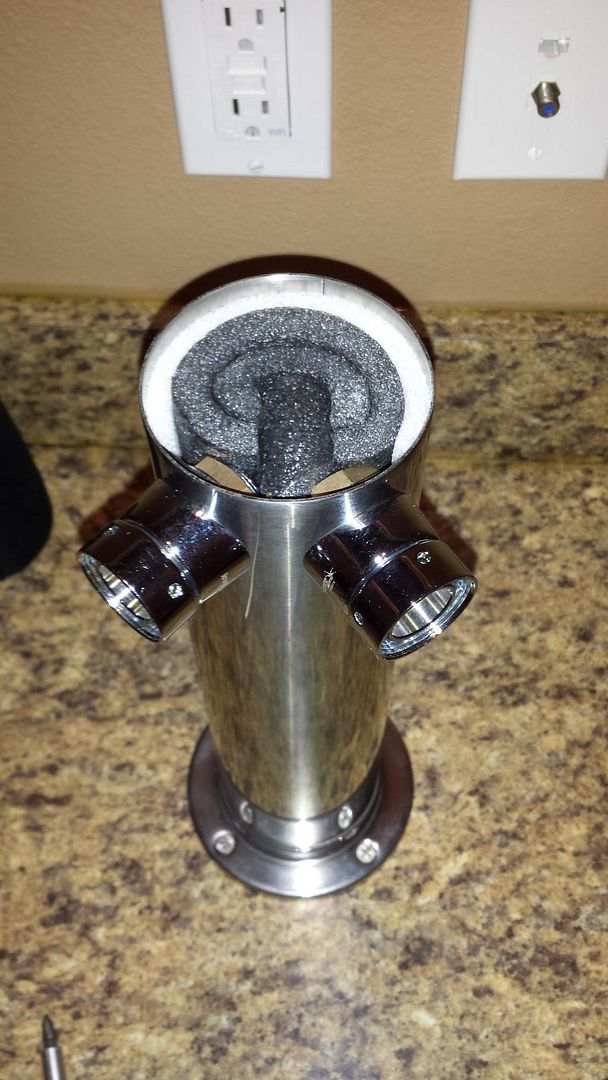
Then I insulated the top of the tower, put the Perlick faucets on and snapped the cap in place.
Image
Image

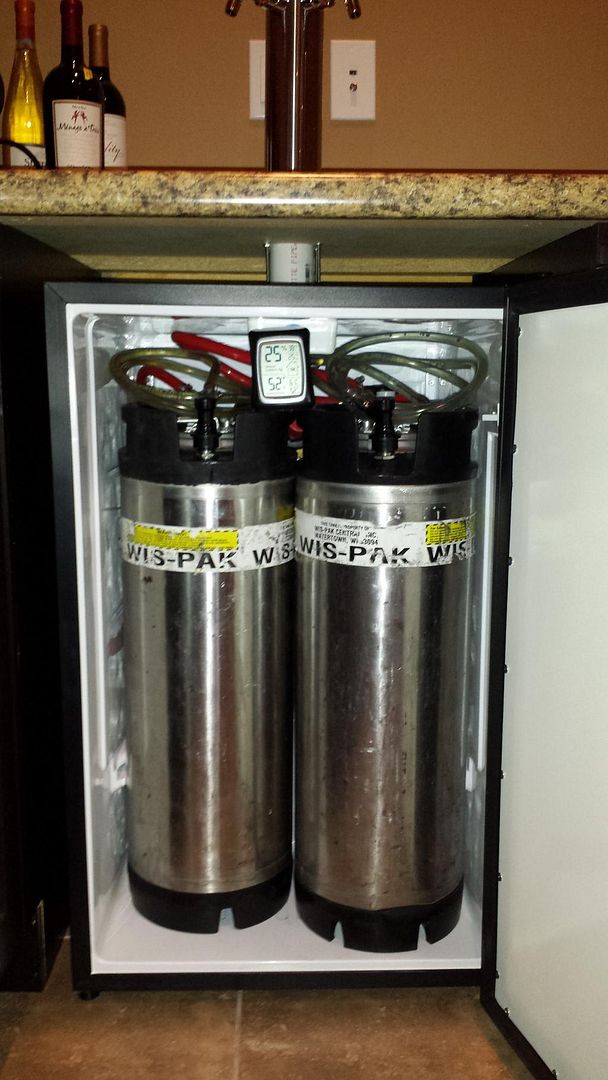
Cleaned the lines and now it’s time to stuff everything inside. Put my 5# CO2 tank on the hump and secured it with bungee cords. Moved my kegs in that had been patiently waiting in the fermentation chamber at 38 degrees, and hooked up the lines.
Image

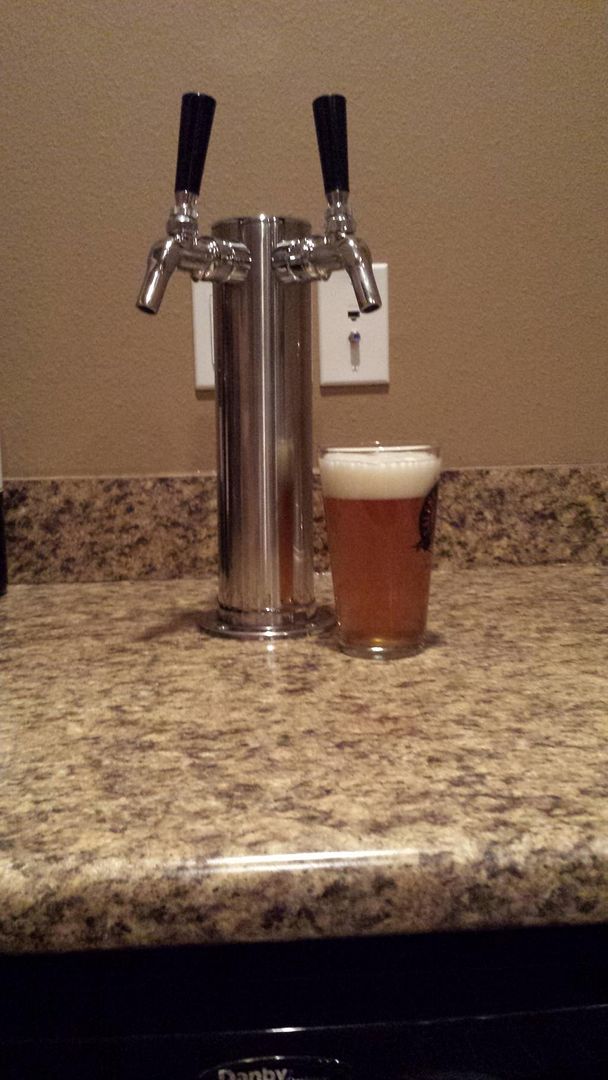
Time for the moment of truth. The first official pour of my cream ale from the new tower! Perfect pour through 10’ of line @ 12PSI! :banana:
Image

Can’t believe I waited this long to get this done. Now I need to brew again so I can build up the keg pipeline!
Image
Fermenting: Bucket 1 - Fresh Squeezed IPA; Bucket 2 - Empty

Kegged: Keg 1 - Irish Red; Keg 2 - Cream Ale; Keg 3 - Amber Ale; Keg 4 - APA; Keg 5 - Empty; Keg 6 - Empty; Keg 7 - Empty
The reason why the above list is so small Home Theater Build
User avatar
BlackDuck
Moderator
Moderator
Posts: 5156
Joined: Wed Aug 07, 2013 7:49 am
Location: Canal Winchester, Ohio

Re: Danby 440BL Kegerator Conversion

Post by BlackDuck »

Damn...that is awesome. Nice work!!!
ANTLER BREWING
Drinking
#93 - Gerst Amber Ale
Conditioning and Carbing

Fermenting

On Deck
User avatar
RickBeer
Brew Guru
Brew Guru
Posts: 3099
Joined: Thu Aug 08, 2013 1:21 pm
Location: Ann Arbor, Michigan (Go Blue!)

Re: Danby 440BL Kegerator Conversion

Post by RickBeer »

Very nice!
I have over 9,000 posts on "another forum", which means absolutely nothing. Mr. Beer January 2014 Brewer of the Month with all the pomp and circumstance that comes with it...

Certificate in Brewing and Distillation Technology

Sites to find beer making supplies: Adventures in Homebrewing - Mr. Beer - MoreBeer
My Beer - click to reveal
Currently using 6 LBKs.

Beers I regularly brew:
Bell's Best Brown clone
Irish Hills Red - I call this "Ann Arbor Red"
Mackinac Island Red - I call this "Michigan Red"
Oatmeal Stout - I call this Not Fat, Stout - Oatmeal Stout

Bottled 5 gallons of Ann Arbor Red on 4/18/17. Bottled 5 gallons of Michigan Red on 5/8/17.

Brewed in 2017 - 22.13 gallons (19.91 in 2012, 48.06 in 2013, 61.39 in 2014, 84.26 in 2015,46.39 in 2016)
Brewed in lifetime - 282.14 gallons
Drinkable beer on hand -  13.58 cases, with 6.11 cases ready in May and early June.
Average cost per 12 pack through all beer brewed - $6.27(ingredients only)
User avatar
Beer-lord
Moderator
Moderator
Posts: 9634
Joined: Mon Aug 05, 2013 2:48 pm
Location: Burbs of the Big Easy

Re: Danby 440BL Kegerator Conversion

Post by Beer-lord »

You are definitely braver than I am. I thought about what you did and even if my wife would have agreed (very doubtful) my worries were what to do when the kegerator kicks and I can't get one to line up again. Anyway, you missed your calling and you can come to my house and install mine for me.
Great job.....just one complaint.....you should have gone for a tri-tap while you were at it. :banana:
PABs Brewing
Planning
Brew good beer and live a hoppy life
Fermenting

Drinking
Disfucted
Smelly Hops
(split batch) A Many Stringed Bow
Up Next
Men In Black
User avatar
Inkleg
Brew Guru
Brew Guru
Posts: 4582
Joined: Sun Aug 11, 2013 5:44 pm
Location: Lilburn, GA

Re: Danby 440BL Kegerator Conversion

Post by Inkleg »

What a great project, super nice write up and fantastic finished job. :clink:
Enjoy those pours.
Naked Cat Brewery On Tap
Yazoo Sue Smoked Porter
Octoberfest
Le Petite Saison
Czech Pale Lager
A Toast to Big Fuzzy Russian Imperial Stout at 10%
Belgian Blond
Flower Power IPA
4 Kilts Clueless Belgian Strong
One Wort Two Yeast with Wyeast 2206
One Wort Two Yeast with WLP940
Shipwreck Saison
User avatar
DaYooper
Braumeister
Braumeister
Posts: 919
Joined: Fri Aug 16, 2013 11:09 am
Location: Motownish, Michigan

Re: Danby 440BL Kegerator Conversion

Post by DaYooper »

My wife would KILL me if I ever made mention of drilling through a nice counter top like that. You are a better and braver man than I !!!
Silverleaf Vineyard & Winery / Old Mission Hops Exchange / Porchside Vineyard / The North York Brewing Company
User avatar
RickBeer
Brew Guru
Brew Guru
Posts: 3099
Joined: Thu Aug 08, 2013 1:21 pm
Location: Ann Arbor, Michigan (Go Blue!)

Re: Danby 440BL Kegerator Conversion

Post by RickBeer »

No issue with my drilling a hole in the counter, because my wife would allow a kegerator in the kitchen right after hell freezes over - for the 17th time.
I have over 9,000 posts on "another forum", which means absolutely nothing. Mr. Beer January 2014 Brewer of the Month with all the pomp and circumstance that comes with it...

Certificate in Brewing and Distillation Technology

Sites to find beer making supplies: Adventures in Homebrewing - Mr. Beer - MoreBeer
My Beer - click to reveal
Currently using 6 LBKs.

Beers I regularly brew:
Bell's Best Brown clone
Irish Hills Red - I call this "Ann Arbor Red"
Mackinac Island Red - I call this "Michigan Red"
Oatmeal Stout - I call this Not Fat, Stout - Oatmeal Stout

Bottled 5 gallons of Ann Arbor Red on 4/18/17. Bottled 5 gallons of Michigan Red on 5/8/17.

Brewed in 2017 - 22.13 gallons (19.91 in 2012, 48.06 in 2013, 61.39 in 2014, 84.26 in 2015,46.39 in 2016)
Brewed in lifetime - 282.14 gallons
Drinkable beer on hand -  13.58 cases, with 6.11 cases ready in May and early June.
Average cost per 12 pack through all beer brewed - $6.27(ingredients only)
User avatar
gwcr
Moderator
Moderator
Posts: 1404
Joined: Mon Aug 05, 2013 9:11 am
Location: Cedar Rapids, IA

Re: Danby 440BL Kegerator Conversion

Post by gwcr »

Thanks guys. Yeah, this is no where near the kitchen. I can only play in my little corner of the basement...
Fermenting: Bucket 1 - Fresh Squeezed IPA; Bucket 2 - Empty

Kegged: Keg 1 - Irish Red; Keg 2 - Cream Ale; Keg 3 - Amber Ale; Keg 4 - APA; Keg 5 - Empty; Keg 6 - Empty; Keg 7 - Empty
The reason why the above list is so small Home Theater Build
User avatar
John Sand
Brew Guru
Brew Guru
Posts: 4310
Joined: Wed Aug 07, 2013 9:01 pm
Location: Long Island NY

Re: Danby 440BL Kegerator Conversion

Post by John Sand »

Beautiful, and inspirational.
My beer fridge stands next to the hutch. The 2.5 gallon keg inside uses a picnic tap. Someday I'd like to put a tap tower on it. I hadn't read the HBT thread on copper pipe, but I did think of running some aluminum bar up there to transfer heat. The pipe is definitely better.
Making beer and stew for the Zombie Apocalypse.
Never mind, there it is.
User avatar
Bluejaye
Fully Fermented
Fully Fermented
Posts: 395
Joined: Tue Aug 06, 2013 2:43 pm
Location: S.E. MI

Re: Danby 440BL Kegerator Conversion

Post by Bluejaye »

Great job. I'd love to do this myself, but am afraid to death of drilling a hole in my Danby.
User avatar
gwcr
Moderator
Moderator
Posts: 1404
Joined: Mon Aug 05, 2013 9:11 am
Location: Cedar Rapids, IA

Re: Danby 440BL Kegerator Conversion

Post by gwcr »

Bluejaye wrote:Great job. I'd love to do this myself, but am afraid to death of drilling a hole in my Danby.
Yeah, that part freaked me out a bit too. If you have the 440BL, there aren't any refrigerant lines running through the top at that point. If you look at the top inside between the light and the cooling plate, there is just the single cable (thermostat, power for the light) running front to back. That's why I started drilling from the inside. Real easy to move that cable out of the way a bit, then no worries!
Fermenting: Bucket 1 - Fresh Squeezed IPA; Bucket 2 - Empty

Kegged: Keg 1 - Irish Red; Keg 2 - Cream Ale; Keg 3 - Amber Ale; Keg 4 - APA; Keg 5 - Empty; Keg 6 - Empty; Keg 7 - Empty
The reason why the above list is so small Home Theater Build
User avatar
jimjohson
Brewer of the Month
Brewer of the Month
Posts: 2603
Joined: Tue Jul 09, 2013 9:14 pm
Location: Cusseta Ga
Contact:

Re: Danby 440BL Kegerator Conversion

Post by jimjohson »

That looks great!
"Filled with mingled cream and amber
I will drain that glass again.
Such hilarious visions clamber
Through the chambers of my brain
-- Quaintest thoughts -- Queerest fancies
Come to life and fade away;
Who cares how time advances?
I am drinking ale today."

Edgar Allan Poe
User avatar
Kealia
Brew Guru
Brew Guru
Posts: 5588
Joined: Thu Aug 08, 2013 10:52 pm

Re: Danby 440BL Kegerator Conversion

Post by Kealia »

Frickin' gorgeous. Very nice work and now you can really enjoy the fruit of your labor!
User avatar
FedoraDave
FedoraDave
FedoraDave
Posts: 4207
Joined: Fri Aug 09, 2013 5:52 pm
Location: North and west of the city
Contact:

Re: Danby 440BL Kegerator Conversion

Post by FedoraDave »

I am extremely impressed. What a beautiful job!
Obey The Hat!

http://www.homebrew-with-the-hat.com

Some regard me as a Sensei of Brewing
Fedora Brauhaus
Up Next:
Old Smokey Amber Ale
Fermenting/Conditioning
100 Years War IPA -- Rocking Chair Orange Wheat -- Ottertoberfest
Drinking:
South Ferry Steam Beer
User avatar
Dawg LB Steve
Brew Guru
Brew Guru
Posts: 2778
Joined: Fri Feb 07, 2014 7:39 pm
Location: Greater Cleveland East

Re: Danby 440BL Kegerator Conversion

Post by Dawg LB Steve »

Nice setup! Where did you get the fridge? Been looking local everything has freezer section.
:clink:
MONTUCKY BREWING
Currently brewing:

Next Up?
Kolsch?
Ginger Beer?
Traveling Red?
Yazoo Gerst Clone?
Peanut Butter Porter?

Currently Conditioning:
Cherry Mead
California Moscato

Currently enjoying:
Hardly Apple Cider on tap
Hardly Cherry Lime-Aid on tap
Oktoberfestive-Ale on tap
PGA Cider (Pear, Ginger, Apple) on tap 3rd Founders Cup 2016 King Of The Mountain on tap
Bottoms Up Brown on tap GOLD 2016 Ohio Brew Week Silver 2016 Ohio State Fair Silver 2016 Son of Brewzilla, Silver 2015 Son of Brewzilla, Bronze 2015 King Of The Mountain on tap
NITWIT BELGIAN STRONG ALE Banjo-Dawg RCE bottled
DAWG LB PALE ALE bottled
CITRA SLAPPED AMBER ALE bottle
MO FREEDOM SMaSH bottle
HOP TO IT IMPERIAL IPA bottle

Medal Count
Gold 3
Silver 5
Bronze 5
Actively brewing since December 2013
Post Reply