Danby 440BL Kegerator Conversion
Posted: Thu Feb 12, 2015 11:46 am
Finally found the time to convert my Danby 440BL fridge into a full time kegerator this week. I've been kegging for a couple years with only one keg in the fridge and a picnic tap. Worked fine, but wasn't the most user friendly setup when people came over (open fridge, pull out tap, fill glass, put tap back in and make sure it didn't drip, etc.), and I could only have one keg at a time in there. Also, my double faucet tower had been sitting in a box for 8 months so it was definitely time to put that investment to use!
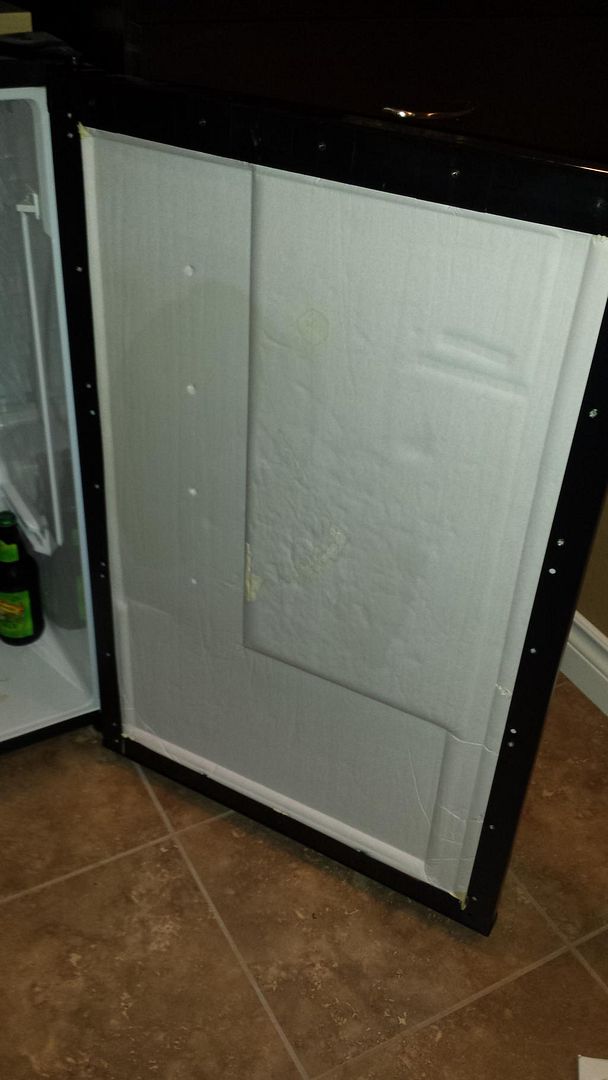
In order to fit two cornies, I had to remove the door panel because it took up too much space inside. Thankfully, my Danby was a slightly older model so the door panel was screwed on instead of glued on. Super easy to take off. Just removed the screws and it came right off. The seal was easy to remove from the panel as there was no adhesive there either. (Sorry for the blurry pic)

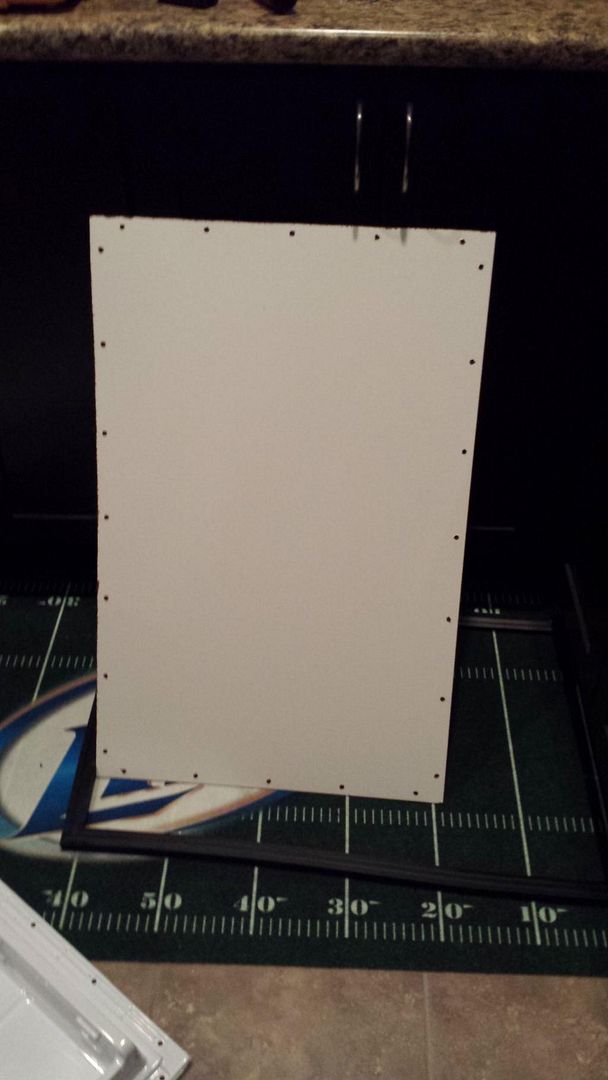
I picked up a 4’x4’ piece of marker board from Lowes, traced around the door panel, marked the screw holes and cut it out.
Put the door seal from the original door panel on the new “door panel” and screwed it back on. Perfect fit, and the door still closed and sealed!


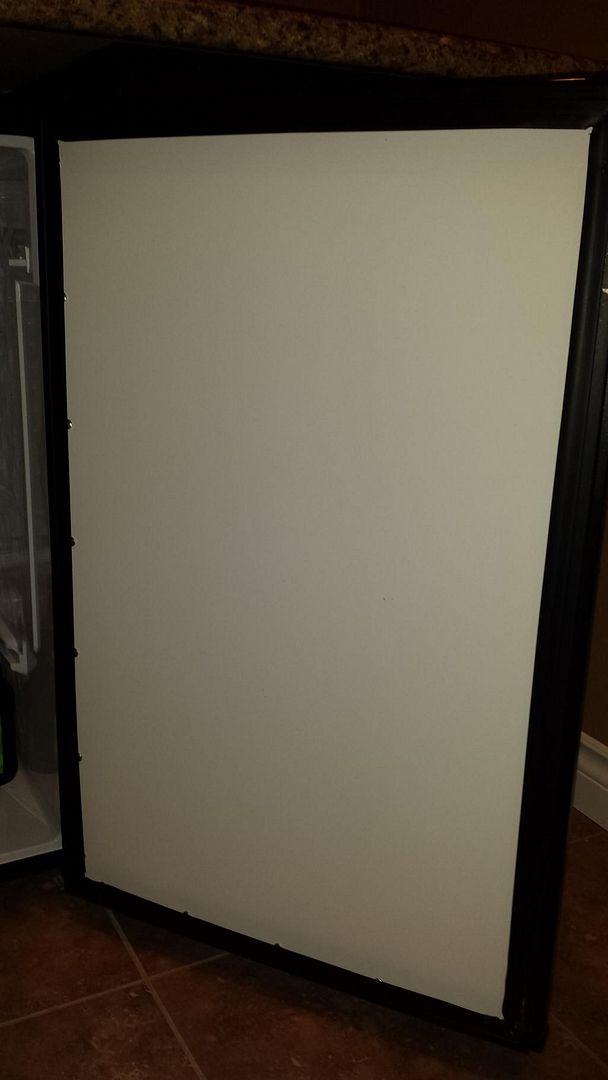
The only downside is the old panel would trip the switch for the fridge light when it closed. Decided to just remove the bulb for now instead of trying to figure out how to rig something up on the new door panel. Another bonus is the door panel is now a dry erase board, so I can write info about the brews on there if I want to.
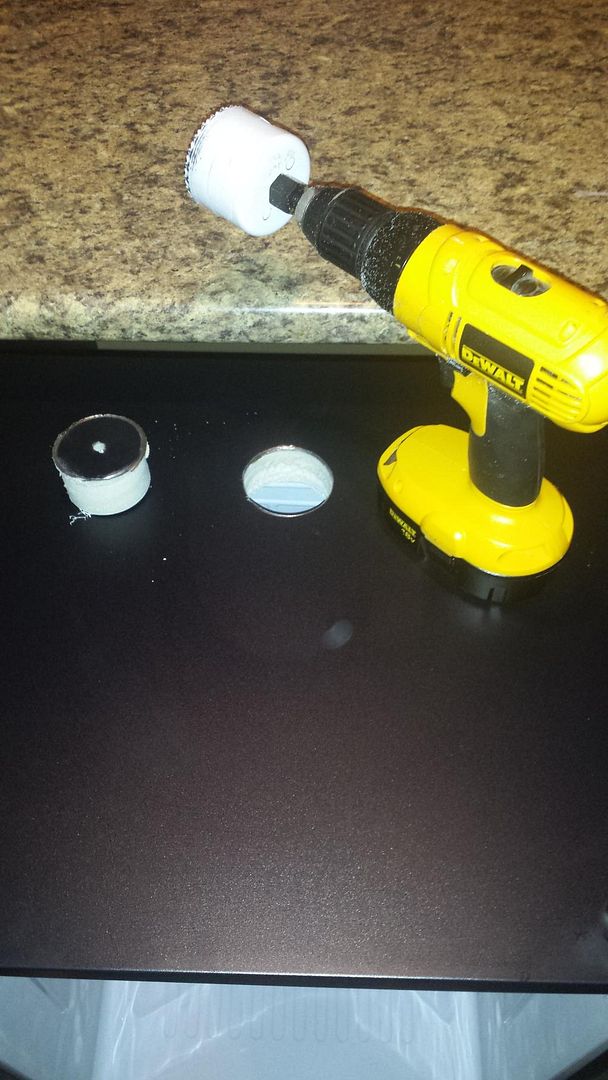
The next part was a bit stressful since it’s something you really can’t undo. Time to cut big holes in the top of the fridge and counter. I started the fridge from the inside to make sure I didn't hit any wires or cooling lines. Once the drill bit from the hole saw popped through the metal top, I finished the cut from above.
I sealed up the inside of the hole with foil tape, then put the fridge back in place and marked the center of the hole on the underside of the counter. Drilled a pilot hole from underneath, and used the hole saw from the top to get a nice hole in an otherwise perfect counter…

Since I did a countertop mount instead of directly to the fridge, I needed a conduit between the counter and the fridge to keep it a closed system. A length of 2” PVC between the two holes sealed with silicon adhesive on both ends did the trick there. 2” PVC is actually 2-3/8” outside diameter, so it fit the hole nicely with only a small gap to seal with the silicon.
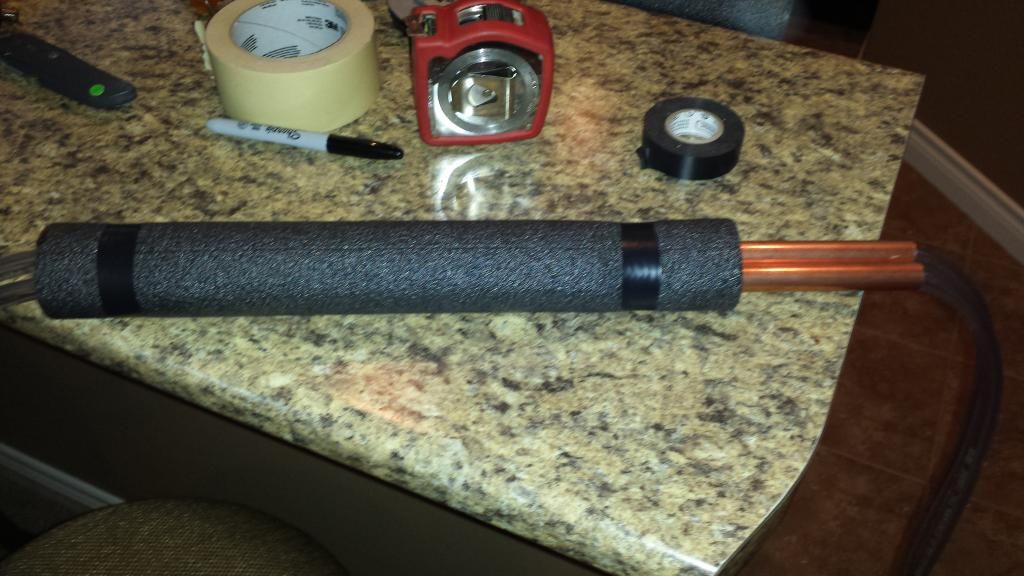
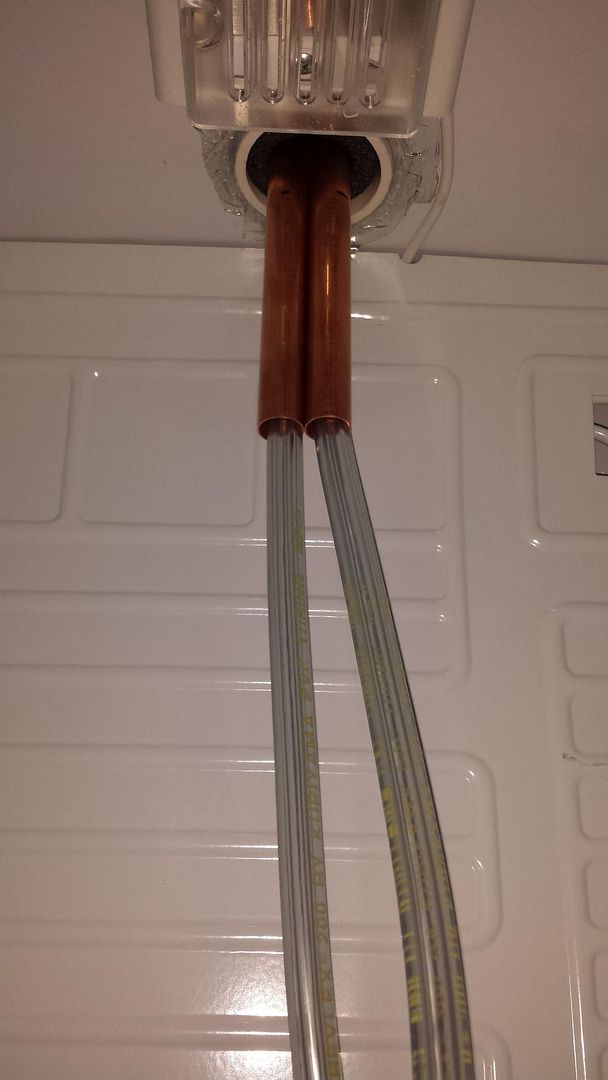
I had been reading about the need to keep the lines in the tower cold to avoid a foamy first pour. I was considering building a small blower until I ran across a passive cooling thread on HBT. Since copper is a great conductor of heat/cold, many were using copper pipe with great results in keeping the lines cold all the way to the tap. I chose this method so I wouldn't have to build something else, drill another hole in the fridge and mess with electricity. I used enough copper so about 4 inches protruded into the fridge. Wrapped the part of the copper that would be inside the tower with pipe insulation and threaded it up the lines into the tower.
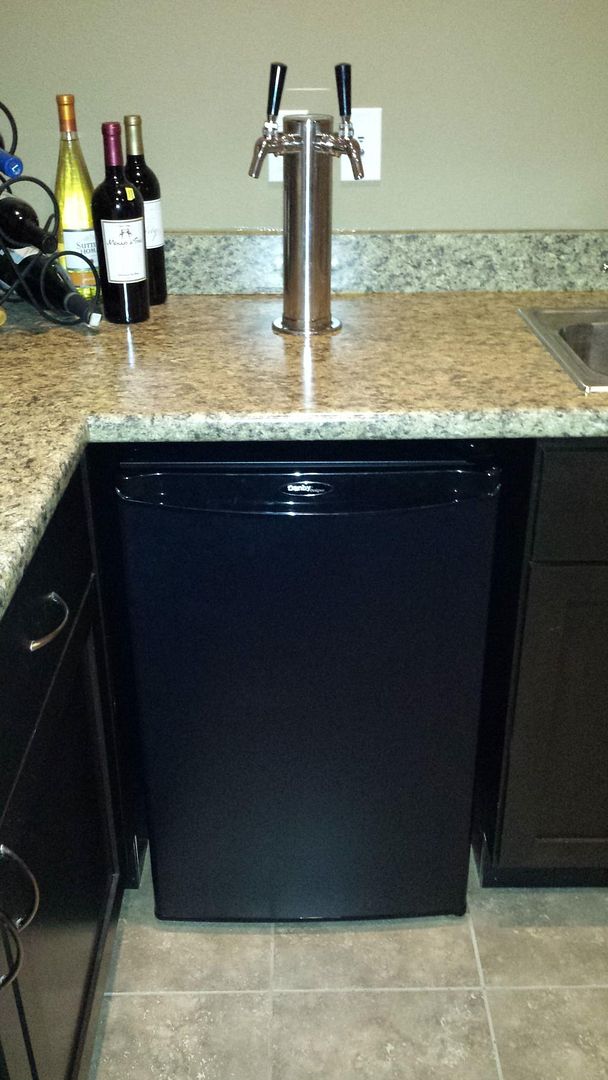
Then fed the lines through the conduit and installed the tower on the countertop.

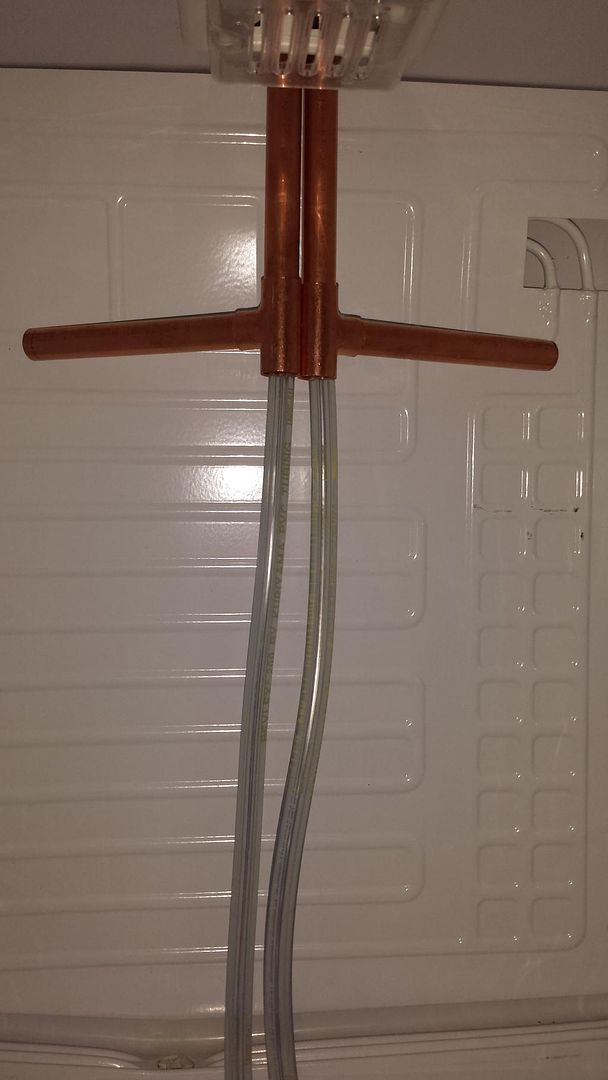
I wanted to give the copper a little more surface area, so I threaded a couple of T’s up the lines and put a couple extensions out to the sides by the coils. Friction fit only here as they aren't going anywhere.
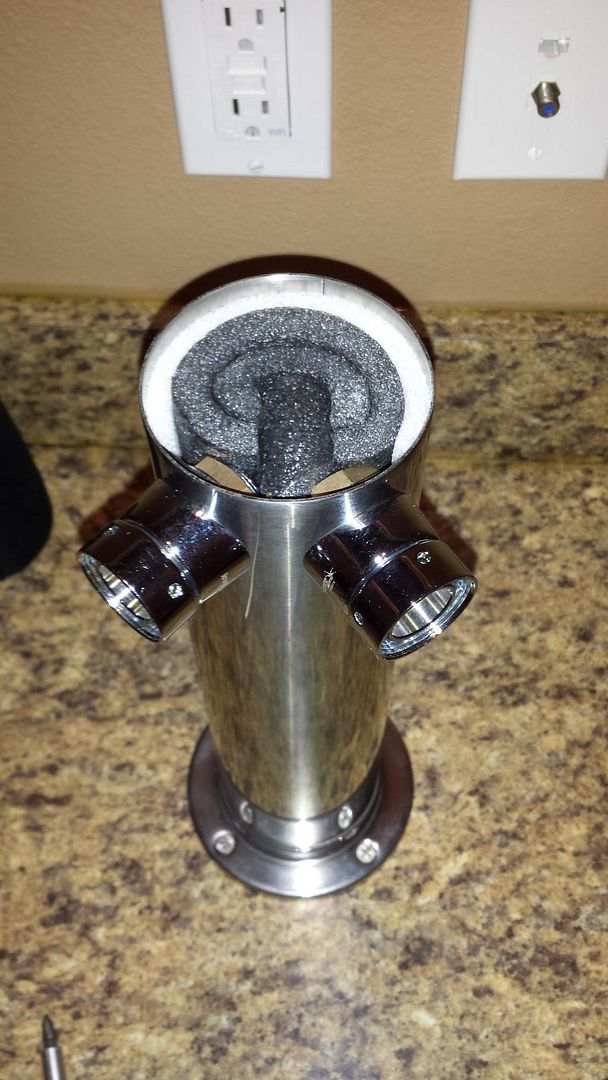
Then I insulated the top of the tower, put the Perlick faucets on and snapped the cap in place.

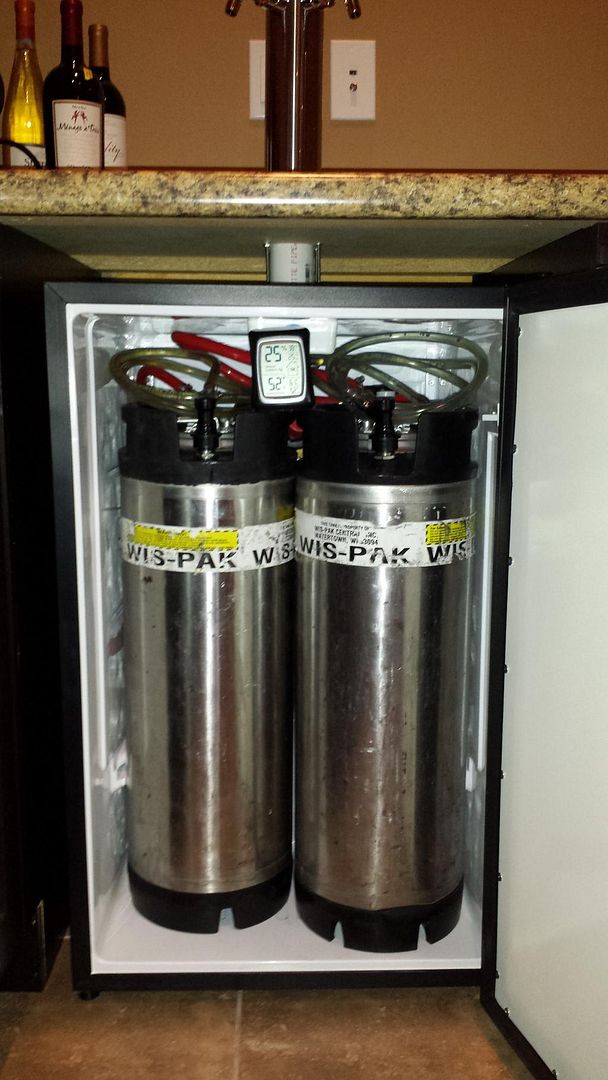
Cleaned the lines and now it’s time to stuff everything inside. Put my 5# CO2 tank on the hump and secured it with bungee cords. Moved my kegs in that had been patiently waiting in the fermentation chamber at 38 degrees, and hooked up the lines.
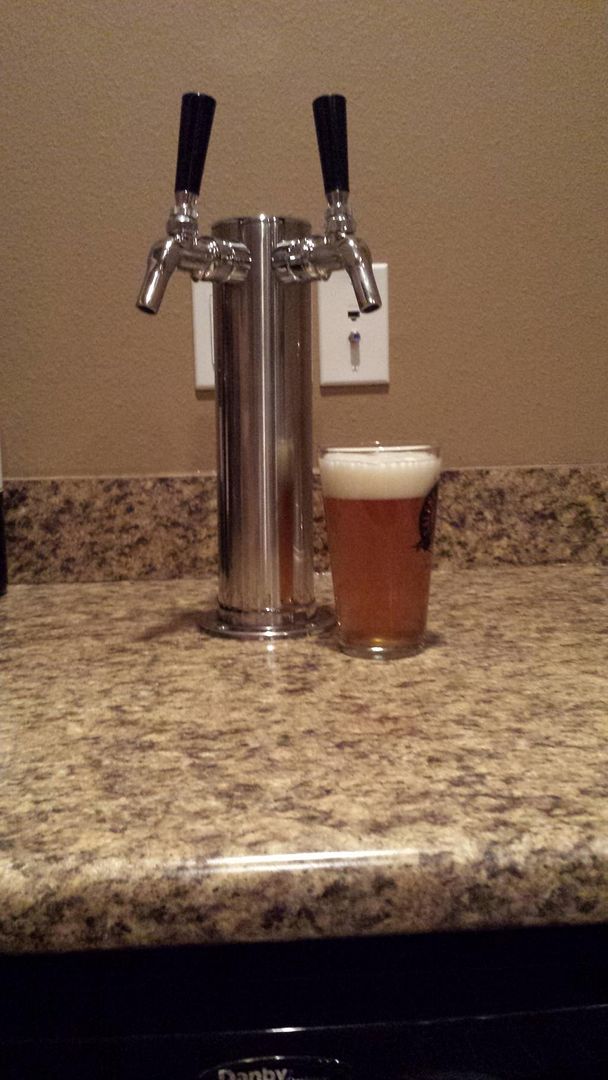
Time for the moment of truth. The first official pour of my cream ale from the new tower! Perfect pour through 10’ of line @ 12PSI!
Can’t believe I waited this long to get this done. Now I need to brew again so I can build up the keg pipeline!
In order to fit two cornies, I had to remove the door panel because it took up too much space inside. Thankfully, my Danby was a slightly older model so the door panel was screwed on instead of glued on. Super easy to take off. Just removed the screws and it came right off. The seal was easy to remove from the panel as there was no adhesive there either. (Sorry for the blurry pic)
I picked up a 4’x4’ piece of marker board from Lowes, traced around the door panel, marked the screw holes and cut it out.
Put the door seal from the original door panel on the new “door panel” and screwed it back on. Perfect fit, and the door still closed and sealed!
The only downside is the old panel would trip the switch for the fridge light when it closed. Decided to just remove the bulb for now instead of trying to figure out how to rig something up on the new door panel. Another bonus is the door panel is now a dry erase board, so I can write info about the brews on there if I want to.
The next part was a bit stressful since it’s something you really can’t undo. Time to cut big holes in the top of the fridge and counter. I started the fridge from the inside to make sure I didn't hit any wires or cooling lines. Once the drill bit from the hole saw popped through the metal top, I finished the cut from above.
I sealed up the inside of the hole with foil tape, then put the fridge back in place and marked the center of the hole on the underside of the counter. Drilled a pilot hole from underneath, and used the hole saw from the top to get a nice hole in an otherwise perfect counter…
Since I did a countertop mount instead of directly to the fridge, I needed a conduit between the counter and the fridge to keep it a closed system. A length of 2” PVC between the two holes sealed with silicon adhesive on both ends did the trick there. 2” PVC is actually 2-3/8” outside diameter, so it fit the hole nicely with only a small gap to seal with the silicon.
I had been reading about the need to keep the lines in the tower cold to avoid a foamy first pour. I was considering building a small blower until I ran across a passive cooling thread on HBT. Since copper is a great conductor of heat/cold, many were using copper pipe with great results in keeping the lines cold all the way to the tap. I chose this method so I wouldn't have to build something else, drill another hole in the fridge and mess with electricity. I used enough copper so about 4 inches protruded into the fridge. Wrapped the part of the copper that would be inside the tower with pipe insulation and threaded it up the lines into the tower.
Then fed the lines through the conduit and installed the tower on the countertop.
I wanted to give the copper a little more surface area, so I threaded a couple of T’s up the lines and put a couple extensions out to the sides by the coils. Friction fit only here as they aren't going anywhere.
Then I insulated the top of the tower, put the Perlick faucets on and snapped the cap in place.
Cleaned the lines and now it’s time to stuff everything inside. Put my 5# CO2 tank on the hump and secured it with bungee cords. Moved my kegs in that had been patiently waiting in the fermentation chamber at 38 degrees, and hooked up the lines.
Time for the moment of truth. The first official pour of my cream ale from the new tower! Perfect pour through 10’ of line @ 12PSI!
Can’t believe I waited this long to get this done. Now I need to brew again so I can build up the keg pipeline!